Tuesday, November 13, 2012

Bell[e of the Ball] Pepper Soup

A note by the author suggested one serve this soup alongside the Whole Wheat Penne with Cabbage and Cumin. Done and done. My husband enjoyed the soup even more than the main dish, which--since it was fabulous, means this was even more so. Mmmmm.

Bell Pepper Soupfrom Diana Shaw's Almost Vegetarian

Heat the olive oil in a medium saucepan over medium-high heat. Add the onions, carrot, and celery, turn the heat down to medium and saute until softened, about 10 minutes. Add the bell peppers and potato, and stir to coat with the other vegetables. Add the vegetable broth, bring to a boil, cover, and lower heat to medium-low. Simmer until the potato falls apart when you pierce it with a knife, about 8 minutes. Puree the soup (using a stick blender in the pot or by transferring the soup to a food processor). Serve hot.
I used four peppers instead of just the two that were called for (why not?) which gave this soup a very peppery taste. I'm not usually a "blend everything together" soup fan, but in this case it was fantastic.


Sunday, November 11, 2012

nevermind kings, tell me more about cabbages

Three heads of red CSA cabbage brought me to my knees in desperation was my inspiration for this recipe search. I'd already had to toss one head because I'd left it so long it turned squishy (yuck), and I shredded and froze another for future batches of borscht, but I wanted to use the third.

Diana Shaw's cookbook Almost Vegetarian has been sitting on my shelves, neglected and forlorn, for nearly ten years now. On this occasion I suppose it was Fate's hand which guided me to its lime green spine and made me pluck it from the shelf. The index search brought me to this recipe--a gift from the gods (or as near as cabbage in any form can be considered a gift):
Whole Wheat Penne with Cabbage and Cumin

  • 2 tsp extra virgin olive oil
  • 1 onion, thinly sliced
  • 1 large carrot, peeled and thinly sliced
  • 2 cups shredded red cabbage
  • 1 medium red or white low-starch potato, peeled and sliced paper thin
  • 1 tsp whole cumin seeds
  • 4 ounces fontina or taleggio cheese, thinly sliced
  • 3 cups imported dried whole wheat penne

Heat the olive oil in a large skillet over medium heat. When hot, add the onion, carrot, cabbage, potato, and cumin, and saute until the onion is soft and limp, about 8 minutes. Cover and let steam until the cabbage is very tender and the potato has cooked through, about 12 minutes. Turn off the heat. 
Meanwhile, cook the penne according to package directions. Drain, then quickly toss it into the skillet, along with the cabbage mixture and the cheese. Toss briskly with two wooden spoons and serve at once, in warmed bowls.
Even though this was a Hail-Mary-of-cabbage situation, it worked out very well. I substituted a bit from the ingredients list. I was out of cumin seeds so I used ground cumin, and I didn't have either of the fancy cheeses for which the recipe called, so I substituted a bag of shredded mozzarella & parmesan. I would never have considered cabbage and cheese with pasta, but turns out its a very satisfactory combination. In my house, cabbage is more often served raw in salads or cooked to a near soggy mess with brisket--with this pasta dish it's sautéed and then steamed, and then the cheese ensures the cabbage/veggie mix becomes sauce-like, coating the whole wheat pasta. Really, an excellent way to not only use-up cabbage, but to eat pasta. We'll be making this again. Thank you, previously unused cookbook!

Tuesday, September 25, 2012

Broccoli Stems: a treat for the whole family


Sometimes it's the little things. Shulman's cookbook suggested this recipe as a tasty way to use the whole broccoli plant, even if another recipe calls for only the florets. Turns out it's both simple and very, very good.

     Garlic Broccoli Stems 
     from Martha Rose Shulman's Gourmet Vegetarian Feasts


  • Stems from 1 1/2 lb broccoli, peeled and sliced 1/4-inch thick
  • 1/2 tsp sea salt
  • 1 Tbls wine vinegar
  • 1 clove garlic, minced or put through a press
  • 2 Tbls olive or safflower oil
  • [optional:  fresh dill]
  1. Toss broccoli stems with salt in a jar and refrigerate several hours. Pour off whatever liquid accumulates and rinse.
  2. Add vinegar, garlic, [dill] and oil and shake together well. Refrigerate for several hours. Place in a bowl and serve.
Toddler Approved!

Thursday, September 13, 2012

Oodles of Noodles (and a sauce!)

This recipe was recommended as an ideal accompaniment to a side dish I was making. Simple to make, tasty to eat. And another opportunity to use our wasabi powder (because, seriously, unless you're making a lot of sushi rolls, how else are you to use-up the can of powdered wasabi?).

     Noodles with Mirin
     from Moosewood Restaurant Cooks at Home
  • 8 ounces noodles (somen, linguni, or whole wheat spaghetti)
  • 1/2 cup mirin (or sweet sherry)
  • 2 cups water
  • 1 1/2 Tbls vegetable bouillon powder (1 1/2 cubes)
  • 1/4 cup soy sauce
  • 2/3 cup fresh or frozen snow peas or green peas
  • 2 tsp powdered wasabi mixed with 2 tsp water
  • chopped scallions
  1. Bring a large covered pot of water to boil and add the pasta.
  2. While the pasta cooks, bring the mirin, 2 cups of water, bouillon powder, and soy sauce to a simmer in a small saucepan. Add the peas and cook briefly, until they are tender but still bright green. Stir in the wasabi paste.
  3. When the pasta is al dente, drain it and transfer it to a serving bowl. Pour the peas and sauce over the pasta and toss well.
  4. Top with chopped scallions and serve warm, at room temperature, or chilled. (To serve at room temperature, allow the finished dish to sit for 12 to 20 minutes. To serve chilled, refrigerate for at least an hour.)
I'd say this counts as one of my sauces/dressings, no? What are we on now...?

Wednesday, September 12, 2012

Feast Your Nose On This: A Curry Dinner

Mmmm. You're either a curry person or you're dumb not. Here is a three recipe feast for those of you in my pro-curry camp, adapted from Atlas' and Kayte's Vegetarian Express:


Fruit & Spice Pilaf

  • 1 cup raw quinoa (the original recipe called for couscous. My instructions below are for quinoa)
  • 2 Tbls butter
  • 1 onion, finely chopped
  • 2 apples, peeled and diced
  • 1/2 cup chopped mixed dried fruits (I used raisins)
  • 1 tsp cinnamon
  • 1/2 tsp ground ginger
  • 1/2 tsp turmeric
  • Salt, to taste
  • 1/3 cup toasted sliced or slivered almonds (I used walnuts)

  1. Rinse the quinoa and combine it with 2 cups water. Bring to boil, reduce to a simmer and cook for 10-15 minutes on medium or until water is absorbed, cover and let sit for five minutes, then fluff with a fork.
  2. As the quinoa cooks, melt the butter in a skillet on medium heat. Add the onion and saute until translucent.
  3. Add the diced apple into the onion saute, cover, and let cook for another 3-5 minutes or until the apple has softened. Stir the dried fruit into the apple-onion mixture.
  4. Add the cooked quinoa to the skillet. Pour 1/2 cup water into the skillet and sprinkle in the spices. Stir and cook for a couple of minutes, until everything is well-mixed and heated through.
  5. Salt to taste. Add the nuts. Serve. (Alternative:  set the toasted nuts aside in a serving dish and let people sprinkle on their own, to taste.)

Creamed Curried Vegetables
  • 2 large carrots, roughly chopped
  • 2 medium potatoes, scrubbed and cut into large dice
  • 3 cups cut broccoli florets (save the stalks for another recipe)
  • 1 cup peas
  • 2 Tbls flour
  • 3/4 cup whole milk or whole plain yogurt
  • 1-2 tsp curry powder, to taste
  • Salt, to taste
  • 1-2 Tbls minced jalapeno pepper, optional
  1. Place the carrots and potatoes in a large saucepan with enough water to cover all but an inch of their volume. Bring to a simmer, cover, and cook until nearly tender, about 10 minutes.
  2. Add the broccoli and peas. Cover and cook another 5 minutes or so, until broccoli is tender-crisp. 
  3. As the broccoli & peas cook, dissolve the flour in the milk (or mix into the yogurt) and then stir in the curry powder. Add the mixture to the vegetables, followed by the jalapeno (if using). 
  4. Cook, uncovered, another 2-3 minutes until the liquid has thickened. Season to taste with salt.  

Cucumber Raita
  • 1 large cucumber, peeled, quartered, and diced
  • 1 cup whole plain yogurt
  • Salt & Pepper, to taste
  • Fresh dill weed, optional
  1. If cucumber seeds are large and watery, remove before dicing the cucumber (if small, leave them in). 
  2. Combine the cucumber and yogurt in a serving dish and mix thoroughly. Season to taste with salt and pepper (and dill, if using).


Why I love this dinner: The vegetable curry has a snappy zip to it. The simple raita is cool and refreshing. The pilaf is sweet and simple. It's a great combination of flavors to have on one plate. If you're a lover of curry (or suspect you might be) I encourage you to recreate this meal in your own kitchen. It's a great way to warm up as this autumn weather gains hold over summer's warmth, and it's surprisingly quick to make.

Sunday, August 5, 2012

Curried Corn & Peppers

It's high summer, which means... You said it: CORN! It's too good not to buy, but once home it can feel overwhelming, having to whip up continuous batches of corn cakes and breads...

Here's a tasty option I discovered this weekend that's even easier (for me) than loading up a giant pot of boiling water:

Curried Corn and Peppers
from Moosewood Restaurant Cooks at Home from the The Moosewood Collective

  • 1 cup chopped scallions
  • 1 red or green bell pepper, diced
  • 1 Tbl butter
  • 1 tsp curry powder
  • 2 1/2 cups fresh or frozen cut corn
  • 2 tomatoes
  • salt and ground black pepper to taste
Saute the scallions and bell pepper in the butter on medium heat for about 2 minutes. Stir in the curry powder and the corn. Chop the tomatoes and add them to the skillet. Continue to cook for about 5 minutes, stirring frequently, until the vegetables are thoroughly heated. Add salt and pepper to taste.

The cookbook suggests this is a dish that can "play many roles," and they suggest it as a filling for an omelet or burrito (both sound good to me) or as a side accompanying flavored rice dishes or a stuffing for pita bread. 

Saturday, July 28, 2012

Avocado Mayo


As mayonnaise goes this was pretty good. I served it on tomato slices as a side.

Not life-changing, but a nice something to do with avocado.

Sunday, July 22, 2012

Superb Strawberry Omelettes


This did sound a little strange upon first read, but I realized it's like a crepe, and crepes are delicious. As was this (and much easier to make than a crepe). A great way to use strawberries that may otherwise go squishy (does that happen in your house? We so rarely have fresh organic berries that when we do get them, I forget we have them!).

     Strawberry Omelette
     from Martha Rose Shulman's Gourmet Vegetarian Feasts

     For each omelette:
  • 1 Tbls butter for pan
  • 2 eggs, beaten
  • a generous handfull of strawberries, stemmed
  • 2 Tbls plain yogurt
  • 1 tsp mild honey
  • fresh mint for garnish (optional)
  1. Heat butter in an omelette pan, and meanwhile beat the eggs.
  2. Crush the strawberries very slightly and mix together with yogurt and honey.
  3. When the butter has stopped sizzling, pour in eggs and tilt pan to coat evenly. Gently shake pan while lifting edges of omelette so that uncooked eggs can run underneath. As soon as it is set, spread strawberry mixture down the center. 
  4. Fold omelette, cook a minute longer, and turn out of pan onto a plate. Garnish with fresh mint and serve.


I didn't have mint on hand, but otherwise made this according to recipe. Quick, easy, tasty. Perfect for that special early-summer breakfast or brunch. Share it with someone you love!

Saturday, June 30, 2012

A Saucy Side of Green & Gold

This was a good side dish,  but you have to like the taste of sesame (which it so happens I do). I liked the contrasting colors. Substituting the orange for the lime was done out of necessity (started cooking before I realized we'd used-up all the limes) but it worked out well. Still, I look forward to the slightly sharper bit of the lime juice the next time I make this one.

     Broccoli and Carrots with Lime Citrus Dressing
     from Moosewood Restaurant Cooks at Home


  • 2 carrots, thinly sliced on the diagonal
  • 3 stalks broccoli, heads cut into florets, stalks (if using) peeled and sliced on the diagonal


     Dressing


  • 1 Tbls dark sesame oil
  • 1 Tbls soy sauce
  • 2 tsp honey
  • 3 Tbls fresh lime juice (I substituted freshly squeezed orange juice)
  • salt and ground black pepper to taste
  • dash of chili oil, Tabasco, or other hot pepper sauce (optional)
  1. Bring about 2 inches of water to a rapid boil in a covered pot. When the water boils, add the vegetables, cover and simmer for about 5 minutes, until tender but firm.
  2. While the vegetables cook, mix together all of the dressing ingredients. 
  3. Drain the vegetables, plunge them into cold water, drain again, and chill until ready to serve or serve at room temperature.
  4. Just before serving, toss the vegetables with the dressing.
 Counts as number 7 toward my 2012 goal of 24 sauces/dressings!

Friday, June 29, 2012

Re-trying the Refrito Spread

Another recipe from The New Laurel's Kitchen (I know, I know. I should just marry this book already), and this one is really, really good, you guys! The official attempt recorded below is technically from our second batch. The first time we mistakenly misread the part where the onion and garlic should be cooked, and so we chopped them up and added them raw; that made a passable sandwich spread, but left your breath pungent enough to strip the bark off a tree. This time, by (ahem) following the directions, we were able to more completely and less stinkily enjoy this fabulous dish as a dip.

Whip some up and serve at your next office potluck, family picnic, or just bring the entire giant bowl into bed with you and scarf down on dip and chips while watching Angel on Amazon Prime.

Refrito Spread
  • 1 1/2 cup cooked, well-drained pinto, kidney, or black beans
  • 1 bunch scallions or a big onion
  • 1 Tbs oil
  • 1 or 2 cloves garlic
  • 1/2 tsp cumin powder
  • 1 tsp chili powder
  • 1/4 chopped green pepper or chopped green chili pepper
  • 1/2 cup grated cheddar cheese
  • 1/2 tsp salt
   Mash the beans. You should end up with about a cup.
   Chop the onion and saute with whole garlic cloves in oil. When the onion is done, crush the garlic with a fork. Add the spices and the green pepper. (If you are a chili fan, you can use green chilies instead of the pepper.) Cook until the pepper is softened and the spices are fragrant.
   Remove from heat and cool slightly. Add beans and mix. Add cheese and salt, and check the flavor:  if the beans were unsalted you may need more salt.
   Makes about 1 3/4 cups. 
I used pinto beans and substituted tomato salsa for the green pepper (didn't have any on hand and was feeling too lazy to chop up a Jalapeno). Delicious!

Count this as "sauce" number 6 of 24. Don't call me a cheater.

Saturday, June 23, 2012

Puerto Rican Vinaigrette

I have no idea if this recipe authentically represents the popular salad dressings of Puerto Rico (though who am I to disagree with Fannie), but to whomever can rightly claim this dressing I say: bravo!

Very tasty twist to your classic French vinaigrette and an excellent way to bedazzle a simple green salad.

Puerto Rico Dressing 
from The All New Fannie Farmer Boston Cooking School Cookbook 
Mix in a bottle or a jar with a cover
  • 1/2 cup olive or salad oil
  • 1 Tbls mild vinegar
  • 1 Tbls lemon juice
  • 1 tsp salt
  • 1/2 tsp freshly ground pepper
  • 1/2 clove garlic
  • 2 Tbls chopped olives
  • 1 Tbls tomato catsup
Cover. when ready to serve, remove the garlic and shake hard to blend. Makes 1/2 cup.

Other than substituting ketchup for the catsup (hah!) I made it according to recipe and then tossed with a green salad. It was debuted at a potluck and we watched it fly out of the bowl--a hit!

Dressing number 5 toward 24.


Thursday, June 21, 2012

Red Lentil Soup

My copy of Moosewood is secondhand, and over this recipe the previous owner wrote in "****". Who am I to ignore four stars? I had most of the ingredients on hand, so I made it for lunch. My three year old wasn't so interested, but my husband and I loved it. Four stars indeed.


Red Lentil Soup from Moosewood Restaurant Cooks at Home
  • 1 1/2 cups red lentils
  • 6 cups water
  • 3 bay leaves
  • 4 garlic cloves, chopped [I substituted garlic scapes from my CSA]
  • 2 slices fresh ginger root, each about the size of a quarter
  • 2 medium carrots (1 cup grated)
  • 1 cup canned tomatoes, or 1 medium fresh tomato, chopped (undrained)
  • 1 small red or green bell pepper (1/2 cup finely chopped) [I left these out]
  • 1 1/2 cups chopped onions
  • 2 Tbls olive oil
  • 1 1/2 tsp ground cumin
  • 1 1/2 tsp ground coriander
  • pinch cayenne
  • 2 Tbls fresh lemon juice
  • salt and ground black pepper to taste
  • dollop of plain yogurt (optional)
     Sort and rinse the lentils. Put them in a soup pot with the water, bay leaves, garlic [scapes], and ginger. Cover and place on high heat.
     Prepare the carrots, tomatoes, and bell peppers, and add them to the pot. Bring to a boil, stir, reduce the heat, and simmer, covered, for 15 to 20 mins, until the lentils are tender.
     While the vegetables simmer, saute the onion on medium heat in the olive oil in a heavy skillet for about 10 mins or until browned. Add the cumin, coriander, and cayenne and saute for another minute, stirring to prevent sticking. Remove from the heat. When the lentils are tender, remove the bay leaves and ginger from the soup pot. Stir in the sauteed onions and the lemon juice. Add the salt and pepper to taste. Top each bowl with a spoon of yogurt, if desired. 
I served this with the carrot herb salad from the same cookbook, using cilantro instead of parsley, and adding the teaspoon of cumin noted as a variation.  Seemed to make sense, serving them together;  if you use a food processor it's no more trouble to grate ten carrots than two.

Saturday, June 16, 2012

Strawberry Vanilla Pudding Pie with Oat-Nut Crust

With amazing deftness I managed to cram three recipes into one dessert last weekend. I hereby present record to you of a fantastic Strawberry Vanilla Pudding Pie with Oat-Nut Crust.


First make the press-in crust:
Oat-Nut Crust from The New Laurel's Kitchen

  • 2 cups rolled oats
  • 1/2 cup chopped walnuts
  • 3 Tbls water
  • 1/2 tsp salt

Preheat oven to 400F. 
Blend oats and walnuts in blender or food processor until the mixture is floury, with only a few visable oat pieces. turn into bowl and mix in water and salt (try just 2 Tbls water at first, and add the third only if needed to hold the dough together). Press into 9" or 10" pie tin and bake just 10 mins. 

Next, make the pudding:
Vanilla Pudding also from The New Laurel's Kitchen

  • 2 cups milk
  • 1/2 cup brown sugar
  • 1/8 tsp salt
  • 2 Tbls cornstarch or arrowroot
  • 1 tsp vanilla

Gently heat 1 1/2 cups of the milk in a heavy pan. Stir in the sugar and salt. 
Combine the cornstarch or arrowroot with the reserved milk. Add to the milk when it is very hot; cook and stir over low heat until thick.* If you are using cornstarch, continue to cook and stir over very low heat for a few minutes more. (If you want richer version, you can stir in a beaten egg into 1/2 cup of the pudding, then beat that into the whole pudding while it is still very hot.) Cool somewhat and add vanilla. 
Makes about 2 cups. Good warm or cold.

And finally, combine and add fruit!
Berry Pudding Pie yup, still from The New Laurel's Kitchen
Fill a prebaked pie shell or crumb crust with 3 cups or so of fresh blackberries, raspberries, strawberries, blueberries or sliced peaches. Pour Vanilla Pudding over them while it's still warm. Sprinkle with toasted nuts if you like, and chill. 
If you have fruit too pretty to hide, fill your pie shell with pudding and let it cool slightly. Arrange sweet berries or slices of ripe, sweet peach, kiwi, or apricot on top. (You can prevent the sliced fruit from turning brown by dipping it orange juice.)

******************************

A few comments:

First:  since my daughter is allergic to peanuts and any nuts purchased at the store may have been cross-contaminated with peanuts I was careful to rinse the walnuts before I used them for the crust (I set them out to air dry after washing them, so I wasn't added extra liquid to the crust).

Second:  since the oats are being ground down anyway, I used my stash of Quick oats instead of my nice rolled oats.

Third: I don't understand the directions about only adding 2 Tbls of water to the crust. I ended up using more like 6 Tbls of water all told before my crust would stick together. But maybe it's a case-by-case thing.

*Fourth: Have you ever made non-instant pudding before? I hadn't and I was amazed that it was as easy as it was. However, initially it wasn't setting for me and I was frustrated until I Googled about using cornstarch as a thickener. It's essential that you keep the heat high after adding the cornstarch. Don't reduce the heat until after it's started to thicken. I think the recipe's directions were a little misleading in that regard so I'm noting it in my cookbook for the next time (because you know I'll forget).

Fifth: Yum. This is good stuff.

Monday, June 4, 2012

It Fell On the Floor But We Ate It Anyway -Cake

I rarely cry over culinary flops, but this time it was literally too much: I dropped my husband's birthday cake on the kitchen floor.

My three year old and I had carefully navegated the Mama/Toddler baking trade-off (I measured, she stirred. I placed into the oven, she helped me to track the time), and together we'd baked a kick-ass cake. We even mixed the frosting homemade, stirring and stirring the chocolate chips into melty gooey goodness. The cake tins cooled on the open windowpane. They popped out of the pans without tearing. We spread delicious jam and frosting onto the first layer, and successfully placed the top layer, decorating it with more frosting and berries. I set the cake in the cake carrier and attached the carrier's lid. And then I lifted the lid by its large Hey, Use Me To Carry This Cake Pan -looking handle, only to discover that the latches holding the top to the bottom were not, in fact, meant to hold any weight. BAM, the bottom fell out and there I stood, holding the handle of the top of the cake carrier, staring at my husband's birthday cake lying upside down on the kitchen floor. And then the tears, they came.

The top layer was a goner, covered in cat fur and other nasty bits of floor spice. But the bottom layer was rescuable; we carefully used a spatula to separate it from the top layer-turned-floor-flop and restored the un-gross layer to the cake plate. We poured extra frosting on (hurray for extra frosting!) and re-decorated with cherries. Voila--a delicious single-layer birthday cake. Not exactly what I had planned, but in true birthday fashion, a surprise! 

From Isa Chandra Moskowitz's Vegan with a Vengeance:

Raspberry Cherry Blackout Cake
Serves 12 [or maybe 6, if you drop half of it on the floor]
  • 1 1/2 cups all-purpose flour
  • 1/2 cup Dutch-processed cocoa powder [I used Hershey's]
  • 1 tsp baking powder
  • 1 tsp baking soda
  • 1/2 tsp salt
  • 1 1/2 cups plain rice or soy milk [I used cow milk]
  • 1/2 cup canola oil [I used EVOO]
  • 1 (10 ounce) jar raspberry preserves (reserve 1/2 for the batter) [I had cherry jam]
  • 2 tsp vanilla extract
  • 1 1/4 cups sugar
  • Fresh raspberries for decorating and yumminess [I used canned cherries 'cause it's what I had]
Preheat oven to 350 F. Spray two 8-inch round springform cake pans with cooking spray. If you don't have springform [I don't] then use parchment paper rounds on the bottom of two ordinary 8-inch round cake pans to prevent sticking.
Sift together the flour, cocoa powder, baking powder, baking soda, and salt. Combine the milk, oil, 1/2 cup of the preserves, the vanilla, and the sugar in a large bowl and mix with a hand mixer or strong fork. The jam should be mostly dissolved with the rest of the ingredients; some small clumps are okay. Add the dry ingredients to the wet in batches and mix until everything is incorporated. Divide the batter between the prepared pans and bak at 350F for 40 to 45 mins, or until a toothpick or knife comes out clean. Remove from oven and let cool in pans.
When the cakes have cooled fully, spread one layer of cake with a thin layer of the reserved preserves (give the preserves a quick mix with a strong fork to get a spreadable consistency); spread a layer of chocolate frosting [see below] on top of the preserves. Place the other layer of cake on top and spread its top with preserves. Carefully spread the chocolate frosting over the top, then ice the sides...

Chocolate Ganache-y Frosting

  • 3/4 cup soy creamer (plain soy milk will do) [I used cow milk]
  • 6 Tbls nonhydrogenated margarine
  • 10 ounces semisweet chocolate chips [aproximately 1 1/2 cups?]
In a saucepan over medium heat, bring the creamer to a low boil. Add the margarine and melt, turn off the heat, and stir in the chocolate chips until smooth. Let sit for at least 1 hour. I should still have a pourable consistency at this point. If you want a spreadable consistency then refrigerate for an hour. (If you refrigerate it for more than a few hours, it sets too much to spread easily, so you will need to reheat it, then let it sit at room temperature before using.)

Sunday, May 27, 2012

It was a casserole type of night

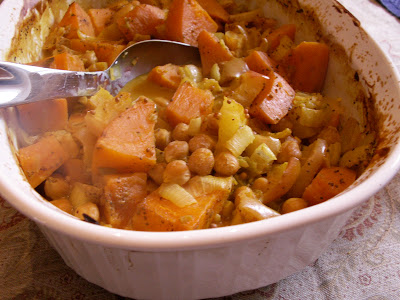
I was searching for something quick to make one evening recently. There wasn't much fresh produce on hand, but I did have one large sweet potato and an onion, plus some ginger root. After checking my cupboards and verifying we had a can of garbanzo beans, I realized I could make this casserole, from Dreena Burton's cookbook Vive Le Vegan!

It was quick to put together (gotta love the recipes that say "mix everything together and cook it), smelled wonderful, and satisfied the whole family (savory enough for the mama, sweet enough for the daddy, beans for the three year old, and sweet potatoes for the nine month old). An absolute win.


Sweet Curry Chickpea Casserole
  • 2 1/2 - 3 cups cooked chickpeas (garbanzo beans)
  • 1 13.5-oz can light coconut milk*
  • 3/4 cup red onion [I used yellow]
  • 1 1/2 cups celery, chopped*
  • 1 - 1 1/2 cups sweet potato, peeled and chopped
  • 1 - 1 1/2 cups apple, peeled and chopped
  • 2 cloves garlic, minced
  • 1 1/2 Tbls freshly grated ginger
  • 1 - 1 1/2 Tbls mild curry paste [I used curry powder]
  • 2 tsp mustard seeds
  • 1 tsp cumin seeds
  • 1/2 tsp turmeric
  • 3/4 tsp sea salt
  • 1/8 tsp allspice

Preheat oven to 375 F. In a large, deep casserole dish, combine all ingredients. Stir through until well combined. Cover and bake for 30 mins. Stir through, cover, and bake for another 30-40 mins, until the vegetables are tender (stir through again once or twice throughout).
Makes 4-5 servings, depending upon accompaniments.

*I had neither coconut milk nor celery,  but I did have a can of cream-of-celery soup and substituted that with grand results. I would like to try the coconut milk version at some point, though. I love coconut curries.


Saturday, May 12, 2012

Matzo Balls

No need to head to the deli, you can get your matzo balls right here. Not even kidding. I have awesome matzo skills.

For the first time ever, and for no apparent reason, I merged two recipes into one, using most of the ingredients from one and the general directions of the other. Two cookbooks, one dish. I don't even know why. Thankfully, it turned out. Below are both recipes.

First, the one I used mainly for the ingredients:

Matzo Balls
from Sara Kasdan's  Love and Knishes: An Irrepressible Guide to Jewish Cooking
6 eggs, separated
1 tsp salt
1/8 tsp pepper
1 cup matzo meal
2 Tbls melted schmaltz 
Beat egg whites until stiff. Beat egg yolks until light. Add salt, pepper, and melted schmaltz to beaten yolks; fold into egg whites. Fold in matzo meal one spoonful at a time. Refrigerate for at least 1 hour. Wet hands and form batter into balls the size of a walnut. Drop into rapidly boiling soup or water. Reduce heat and cook slowly, covered, for about 30 minutes. Serves 12.
Next, the one I used mainly for the instructions:
Matzoh Ball Soup
from Isa Chandra Moskowitz's Vegan with a Vengeance
1 1/2 cups matzoh meal
3/4 tsp salt, plus extra for the boiling water
3/4 tsp ground black pepper
1 (12-oz) package firm silken tofu
8 1/2 cups or so Rich Vegetable Broth
1/4 cup plus 3 Tbls extra-virgin olive oil
1 carrot, peeled
A handfull fresh dill, coarsely chopped
Fresh parsley for garnish
   In a mixing bowl, combine the matzoh meal with the salt and pepper; set aside.
   Crumble the tofu into a blender or food processor, add 1/2 cup of the vegetable broth, and puree until smooth. Add the oil and blend again.
   Mix the tofu mixture with the matzoh meal, making sure that everything is moist. Grate half the carrot into the mixture and mix until it's well distributed. Cover the bowl with plastic wrap and refrigerate for at least an hour and up to overnight. you can't skip this step; it's important in making sure that the matzoh balls will not fall apart when boiled.
   When you are ready to form the balls, fill a large stockpot with enough water to fit all the matzoh balls with minimal touching. Salt the water generously, cover, and bring to a boil.
   Set out a cutting board upon which to line up the formed matzoh balls, and cover it with parchment paper if you have any, to prevent sticking. Also have handy a wet rag to wipe your hands on between forming each matzoh ball.
   Remove the matzoh mixture from the fridge. Form into tightly packed, walnut-size balls and place on the prepared cutting board. When all the balls are prepared, drop carefully into the boiling water, one or two at a time, with a spatula or slotted spoon. Take your time and be careful not to plop one on top of another; they need to remain separate. When all the balls are in the water, cover the pot and DO NOT LIFT LID FOR FORTY MINUTES! Sorry for the caps, just had to stress it. When 40 minutes is up, you can remove the lid. The matzoh balls will have floated to the top and will drop back down when the lid is lifted. This is fun to watch.
   Now they are ready to serve; however, to make them even lighter, you can turn off the heat, cover the pot again, and let them sit in the water for another hour or so. This way they absorb more water and expand a bit more.
   (...) [There's more about making the broth/soup itself, but I didn't use it.]
As I said, I mostly made my matzo balls using Kasdan's recipe (I used eggs) but I didn't use the chicken fat (schmaltz); instead, I felt totally okay substituting with olive oil, since that's what Moskowitz does. And when it came time to mold and cook the balls I appreciated the blow-by-blow instructions (and the CAPS) of the vegan recipe.

We still have matzo meal left over. I'm thinking a few matzo balls might be in store for us this weekend...


Saturday, May 5, 2012

Charosis

Another Passover recipe from last month, because it wouldn't have been Passover without the mortar.

Charosis
from Love and Knishes
2 tart apples
1/4 cup nuts (preferably walnuts) [I used pecans]
1/4 tsp cinnamon
1 tsp honey
1 Tbls Passover wine
Pare and core apples. Chop apples and nuts together finely. Add cinnamon, honey and wine. Makes about 2 cups / Serves 10-12.

 Nothing especially fancy about the recipe, but just because it's basic doesn't mean it's flavorless. On the contrary, this was enjoyed this as much as any apple sauce the consistency of brick mortar can be enjoyed. Which = we loved it. I absconded with the leftovers of work lunches and felt guilty about it. It's that splash of wine, I think, that really kicks it up a notch. Mmmmmm.

Sauce #4 of my goal of 24.

Friday, May 4, 2012

Kimchi

Delving into the wild world of lacto-fermented foods...

from Nourishing Traditions
by Sally Fallon
Korean Sauerkraut (Kimchi)

  • 1 head cabbage, cored and shredded [called for Napa but I used green]
  • 1 bunch green onions, chopped
  • 1 cup carrots, grated
  • 1/2 cup daikon radish, grated (optional) [I didn't have any]
  • 1 Tbls freshly grated ginger
  • 3 cloves garlic, peeled and minced
  • 1/2 tsp dried chile flakes
  • 1 Tbls sea salt
  • 4 Tbls whey (if not available, use an additional 1 Tbsp salt)

Place vegetables, ginger, garlic red chile flakes, sea salt and whey in a bowl and pound with a wooden pounder or a meat hammer to release juices. Place in a quart-sized, wide-mouth mason jar and press down until the juices rise to the top of the cabbage. The top of the vegetables should be at least 1 inch below the top of the jar. Cover tightly and keep at room temperature for about 3 days before transferring to cold storage.

The most difficult part of this recipe was mashing the kimchi down until the juices rose to the top. Took forever, likely because I was using the wrong sort of tool. At the time I was starting to think it was never gonna happen, but eventually it did work, I closed the lid, and then began the waiting. Three days on the kitchen counter and then a few weeks in the refrigerator (our basement is technically 5-10 degrees too warm to be considered cold storage).

We broke-in the kimchi this week. Delicious! Sauerkraut it is indeed (we love it!); the carrots and chile flakes add a fresh note to the otherwise familiar flavor. We'll be using this to top our hot dogs and brats and to accompany our burgers this summer. A big thumbs up.

Monday, April 30, 2012

Perfect for a Hunger Games Theme Luncheon

Here's a recipe I used to make often but had forgotten about until just now.  It's been a while, but I'm planning to put it together again this summer.

Pita with Creamy Zucchini
from Student's Vegetarian Cookbook by Carole Raymond

  • 1 medium zucchini, shredded
  • 1 tsp olive oil
  • 1 lg clove garlic, minced
  • 1/4 tsp mint, dried (more if fresh)
  • 1/2 tsp oregano, dried (more if fresh)
  • 1 Tbsp plain yogurt
  • salt & pepper
  • 1 whole wheat pita bread, split in half

  1. Shred the zucchini on the coarse side of a handheld grater with the largest holes.
  2. In a medium skillet, heat the oil over medium heat. Saute the garlic, zucchini, mint, and oregano, stirring often, until the zucchini is firm-tender and bright green, about 5 mins.
  3. Remove from the heat;  stir in the yogurt. Season with salt and pepper to taste. Scoop the filling into the warm pocket bread halves. 
Yield:  1 serving
This was one of my favorite go-to lunches; I can't believe it been so long since I've made it. Well, forgotten no more, little pita, no more.

Saturday, April 28, 2012

No Whey. Yes, Whey!

Plain yogurt is the bane of my existence. (Okay, not true. I live a privileged life--most food writers do--but not that privileged. However, for the purposes of this post, just go with it.)  Every other month I place a container of plain yogurt in my cart, convinced I will enjoy its wholesome taste the next breakfast.  Think of the parfaits! my heart sings. Upon returning home the supermarket trance breaks, and I remember I don't routinely stock granola or fresh berries (coffee with perhaps a slice of toast are generally all I can rustle first thing in the morning). The unsweetened dairy is slowly buried in the fridge behind ketchup and pickles.  I invariably rediscover the container weeks later and am faced with that most fearful of all challenges: make something amazing that very day from four cups of nearly expired plain yogurt or else toss it all out and prove myself unworthy of life itself. (Something like that.)

This most recent near-yogurtpocalypse I maintained my composure and rescued the entire container from ruin. I've already blogged about using a cup for a sauce;  I then separated the remaining yogurt into whey and cream cheese.

Whey and Cream Cheese
from Nourishing Traditions by Sally Fallon

  • 2 quarts piima milk, whole-milk buttermilk, yogurt, or raw milk
[...]When using yogurt (either homemade or good quality commercial plain yogurt): 

Line a large strainer set over a bowl with a clean dish towel. Pour in the yogurt... cover and let stand at room temperature for several hours or longer. The whey will run into the bowl and the milk solids will stay in the strainer. Tie up the towel with the milk solids inside, being careful not to squeeze. Tie this little sack to a wooden spoon placed across the top of a container so that more whey can drip out. When the bag stop dripped, the cheese is ready. Store whey in a mason jar and cream cheese in a covered glass container. Refrigerated, the cream cheese keeps for about 1 month and the whey for about 6 months.
Makes 5 cups whey and 2 cups cream cheese 

I had less yogurt to begin with and thus gleaned far less than the five and two cups noted in the recipe. Nevertheless the amount of cream cheese was perfect for at least one week's worth of breakfast toast, and the whey, since I am forgetful of its existence and unpracticed in its uses, is still in the fridge, ready for use.

Disaster averted. This time.


Thursday, April 12, 2012

Rock'n Moroccan Passover Casserole!


Before baking.
(Once baked it looks exactly the same except for browner.)

I know once upon a time I told you I'd stay away from making untested main dishes for holidays, but turns out I can't help myself. Finding Passover-friendly meals from what I had in my cupboard/fridge was a fun challenge. And I'm glad I went ahead with it, otherwise I wouldn't have served this dish. Plus, it amuses me that my previous main-dish-for-holiday-fiasco and this sucessful dish are both Moroccan-style.

The cookbook says this casserole is "popular Moroccan Passover fare," and I can see why. Delicious! Go, Morocco!

Moroccan Mashed Potato Casserole (Batata bil Firan)
  • 2 lbs unpeeled baking (russet) potatoes, scrubbed
  • 2 tsp table salt or 4 tsp kosher salt
  • 3 Tbls vegetable oil
  • 3 onions, chopped
  • 1-2 cloves garlic, mashed (optional)
  • 6 large eggs
  • 1/2 tsp pepper
  • 1/4 tsp ground tumeric
  • 1 carrot, diced and cooked until tender
  • 1 cup green peas or 4 scallions, sliced
  • 1/3 cup chopped fresh parsley or cilantro
  1. Put the potatoes in a large pot and add cold water to cover by 1 inch and 1 teaspoon of the table salt or 2 teaspoons of the kosher salt. Bring to a low boil, reduce the heat to medium-low and simmer, uncovered, until fork-tender, about 25 mins. Drain. Peel the potatoes while still warm, run them through a food mill or ricer or mash with a potato masher.
  2. Preheat the oven to 350 degrees.
  3. In a large skillet, heat the oil over medium heat. Add the onions and saute until lightly golden, about 15 mins. If using, add the garlic and saute for 1 minute.
  4. Beat the eggs into the potatoes, one at a time. Stir in the remaining salt, the pepper, and tumeric. Add the onions, cooked carrot, peas, and parsley.
  5. Generously oil a shallow 8-cup baking dish, such as an 8-inch square or 7-by-11-inch dish, then heat in the oven until hot, about 3 mins. Carefully spoon the potato mixture into hte baking dish. Bake until golden and set, about 50 mins. Serve warm or at room temperature.
Variation~ 
Dairy Potato Casserole: Reduce the eggs t o2 adn add 1 cup cream cheese or 1 cup sour cream, or 3/4 cup cream chees and 1/2 cup grated Parmesan cheese. Bake the casserole for about 40 mins, sprinkle with 1/2 cup grated Parmesan or shredded Cheddar cheese, and continue baking for about 10 mins.
I made the straight recipe, omitting the peas because I didn't have any on-hand. I'm glad I caught that the carrot was to be added already-cooked (zapped it in the microwave). And it was great.

I'd make this again in a flash. More satisfying than plain mashed potatoes so a big serving can be served as a main dish or a smaller scoop could be a side.

Tuesday, April 10, 2012

Baked Apples

ready for the baking

I made an attempt at a Passover meal this year and was pleased with the results. Also, it was a fantastic opportunity to use my cookbooks!

Starting with the last first, here is the evening's dessert:  a delicious and simple recipe from my current go-to, Laurel's Kitchen.

Baked Apples
4 large flavorful apples
1/2 cup toasted wheat germ
1/4 cup raisins
1/4 cup chopped walnuts or filberts
zest of 1/2 lemon
1/8 tsp cinnamon
1 Tbls brown sugar
pinch salt

1 tsp flour
3/4 cup apple juice [I actually used lemonade]

Preheat oven to 350. Core apples and place in a greased baking dish with a cover. It's good if the apples are a snug fit: if not, cut up a fifth apple and tuck it around.

Mix the wheat germ, raisins, nuts, lemon zest, cinnamon, sugar, and salt and press lightly into the apple cores. Mix the flour and juice and pour over the apples.
Bake 40 minutes or until the apples are very soft. Let cool slightly before serving for best flavor.

Serves 4.

Variation:
Substitute 2 Tbls toasted sesame seeds for the nuts and use 6 Tbls of raisins.
I used the straight recipe (though I like the sound of the variation), substituting matzo meal for the germ/flour and lemonade for the apple juice (used what I had).

Imagine I'll make this many times in the years to come---apples are a favorite (inexpensive) fruit and for a dessert this is high fiber and includes protein. Can't ask for much more!

Monday, April 9, 2012

Carrot & Parsley Salad


Once upon a time I made this before. This weekend I made it again. So there you have it. 

Yes, it counts.

Carrot and Parsley Salad
from Moosewood Restaurant Cooks at Home
  • 3 1/2 cups grated carrots
  • 1 bunch parsley, finely chopped (about 2 cups)
  • 1 garlic clove, minced or pressed
  • 3 Tbls fresh lemon juice
  • 1/4 cup olive oil
  • 1/2 tsp salt 
  • freshly ground pepper, to taste

Combine the carrots, parsley, garlic, lemon juice, oil, salt and pepper in a serving bowl and toss well. 
Variations
  • Add 1 Tbls of chopped fresh mint
  • Add 1 Tbls of chopped fresh chives
  • Add 1 tsp of ground cumin

We enjoyed it the first time and we enjoyed it again. Nice way to use extra parsley for those times you buy an enormous bunch of parsley but have no idea why you did it. Crazy person.

Monday, April 2, 2012

BBQ Sauce

My husband was grilling for the first time this year and felt inspired to make homemade barbecue sauce. He kindly let me whip it together so I could claim it for this blog. Hurray! Another sauce toward this year's goal (3rd of 24)!


From the Joy of Cooking:

Barbecue Sauce
  • 1 1/2 cups ketchup
  • 1 cup cider vinegar or red wine vinegar
  • 1/4 cup Worcestershire sauce
  • 1/4 cup soy sauce
  • 1 cup packed brown sugar
  • 2 Tbls dry mustard
  • 4 Tbls chili powder, or to taste
  • 1 Tbls grated, peeled fresh ginger, or 1 tsp ground
  • 2 cloves garlic, minced
  • 2 Tbls vegetable oil
  • 3 sliced lemon

Combine ingredients in a medium saucepan over medium heat and cook, stirring often, until the sauce comes to a simmer.  
Simmer for 5 minutes. Remove the lemon slices if desired.  
This sauce will keep, covered and refrigerated, for up to 2 weeks.
Makes about 2 cups.

Our verdict:  It was much thinner than what you expect from a commercially-bottled sauce, but it was tasty. I don't know if I'd rush to make this exact recipe again;  I would probably try out a few different BBQ sauce versions from my other cookbooks, to compare to this one. But certainly it was fine. Had a zest to it. Easy to make. All-in-all to be considered a successful receipe.

Friday, March 23, 2012

Yogurt Sauce

Faced with a rapidly expiring (already past date, but still good) container of plain yogurt, I turned to Laurel's Kitchen for inspiration.

from The New Laurel's Kitchen:

Yogurt Sauce
  • 1 onion, chopped
  • 1 Tbls oil [I used EVOO]
  • 1/4 cup sesame seeds [I only had about 1/8 cup. Just fine.]
  • 1 Tbls lemon juice
  • 1/8 tsp salt [I used a bit more. I like my salt!]
  • pepper to taste [I also like my pepper!]
  • 1/2 - 1 cup plain yogurt [I used a heaping cup]
Saute the onion in the oil. In a separate pan, toast the sesame seeds [takes just a few mins, constantly sturring the seeds]. Put all ingredients into the blender [food processor] and puree. Thin if desired with additional yogurt or buttermilk [I didn't need to thin].

The recipe intro had suggested this sauce as a nice accompanyment to boiled potatoes, for a potato salad. And, whatdoyaknow but I had rapidly expiring (but still hangin' in there!) red potatoes in the cupboard. Boiled them in their jackets and sliced them up. Combined the taters and the sauce. Perfect.

An excellent way to cook with plain yogurt. And another sauce for my Twenty-Four-New-Sauces-in-2012 self-challenge!

Sunday, February 26, 2012

Pie for Dinner!

Do you love complements and enjoy savory pie? I've got the perfect recipe! This is one of those dishes I can remember my mother making. I think I enjoyed it back then (I hope I told her so?), and I know my family and I enjoy it now!

from Recipes for a Small Planet by Ellen Buchman Ewald:
Complementary Pie
  • 3/4 cup raw brown rice (or barley), cooked
  • 1/2 cup dry beans, cooked (use large colorful beans like kidneys or black)
  • 1 Tbs butter
  • 2 cups sliced onions
  • 2 eggs, beaten
  • 1 cup milk
  • 1 cup grated cheddar cheese
  • 1 tsp salt
  • 1 tsp crushed dried tarragon
  • 1/2 tsp worcestershire sauce

While the beans are rice are cooking, saute the sliced onions in the butter until they are very soft and just begin to turn golden. Set them aside. 
Beat the milk into the eggs; stir in the grated cheese, salt, tarragon, and worcestershire sauce. 
Then fold in the sauteed onions, cooked beans, and cooked rice.
Turn the mixture into an oiled 10-inch pie plate. 
Bake at 325 F for 25 to 30 mins, until the custard has set and the edges are browned. Let stand for 10 mins before serving, then slice into wedges.
Variation--Complementary Pie with Crust: Prepare any whole wheat pie crust for a more elegant pie. Use a larger pie pan, press the crust in, pour in the custard, and bake as above.

Of course, much of the Small Planet premise (that ingredients must be combined in carefully-considered amounts so that the dishes contain "complete proteins") has since been largely debunked; it's not nearly so difficult to eat well as a vegetarian. But that in no way means that Ewald's recipes shouldn't be made and enjoyed. Reading through the cookbook is a pleasure (for me); it's interesting, even if its concern for amino acids is unnecessary, and the recipes themselves are well-described, delicious-sounding, and hearty. Plus, I appreciate her suggestions for sides, breads, and salads. Makes planning an entire meal simple. This cookbook is staying on my shelf, and this dish will continue to be a favorite for years to come.

Sunday, February 19, 2012

Chocolate Chip Cookies

We made these a while ago but I'd troubles uploading the picture. (I know, I know. In the absolute oppositeness of usual food blogging, I usually don't worry about such nonsense as having a picture to go with my posts. But in this case, I knew it was there;  it felt wrong to continue on without it.)


          Chocolate Chip Cookies from Joy of Cooking

Position a rack in the center of the oven. Preheat the oven to 375 F. Grease cookie sheets. Mix together thoroughly:
1 cup plus 2 Tbls all-purpose flour
1/2 tsp baking soda
Beat on medium speed until very fluffy and well blended:
8 Tbls (1 stick) butter, softened
1/2 cup sugar
1/2 cup packed light brown sugar
Add and beat until well combined:
1 large egg
1/4 tsp salt
1 1/2 tsp vanilla
Stir the flour mixture into the butter mixture until well blended and smooth. Stir in:
1 cup semisweet chocolate chips
Drop the dough by heaping measuring teaspoonfuls onto hte sheets, spacing about 2" aprt. Bake, 1 sheet at a time, until the cookies are just slightly colored on tiop and rimmed with brown at the edges, 8 to 10 mins. Rotate the sheet halfway through baking for even browning. Remove the sheet to a rack and let stand until the cookies firm slightly, about 2 mins. Transfer the cookies to racks to cool.

Our review:  As much as it pains me to say it, we ate these cookies because they were cookies--Hello, cookies!--not because they were good. We made two batches (separate days, different head bakers) just to be certain the first wasn't a fluke of disappointingness. But no. They're just okay cookies. I mean, yes, we totally ate all of them. But we didn't relish the experience. We just stuffed our faces with mediocre cookies and then felt guilty for not holding out for better. But, after all, a cookie in the hand...

Saturday, January 28, 2012

Happy Chinese New Year!

Eggs:  promise of life in the new year!
(except when they're hardboiled)


In honor of this Year of the [Water] Dragon (I was born in the Year of the [Fire] Dragon myself), I wanted to cook something Chinese this January. The first day of this new lunar year was Monday the 23rd, but I'm still posting because, after all, there are fourteen additional days of festivities that follow the new year's day itself.

Turns out I don't have a Chinese cookbook (madness!) but I was able to find sections in some of my books dedicated to Chinese cookery. I chose a simple appetizer, because lately I've been feeling like a mother of two small children (as, of course, I am).


From Mary Ann Zimmerman's
The Tupperware Book of Picnics, Parties & Snacks Around the World

Eggs Cooked With Tea Leaves

  • 10 eggs
  • 2 Tbls black tea
  • 2 tsp salt
  • 1 tsp black pepper
  • 10 aniseeds
  • 1/3 cup soy sauce

Place eggs in pan, cover with water and bring to a boil, simmer 10 minutes. Soak in cold water and crack all over with a spoon, but keep shell on egg. Add remaining ingredients to water and cook eggs again, this time for 20 minutes. Remove from heat and shell. The resulting pattern is lovely. Store in a 4-cup Wonderlier.


Three things:

  1. I'm not convinced this is a genuine Chinese recipe (though it may be? Anyone know?).
  2. This recipe produces attractive hardboiled (though overcooked, if you must know) eggs that taste exactly (eggsactly! egg-sack-tly? eww....) like normal overly-hardboiled eggs. Yes, the light pattern of the whites is lovely. No, it's not really worth all the time it took to create it. In my opinion.
  3. This cookbook's main premise is to show you how to cook fabulous picnic, party, and snack foods that coincidentally then may be stored perfectly in a Tupperware container. Kind of makes me laugh. We'll see about future dishes I may cook from this book, but I suspect they're all honed to be of a certain shape or volume vs. to be extraordinarily tasty. Perhaps this is the year we'll find out.

Thursday, January 12, 2012

Brown Rice & Resolutions

As part of my new year's resolutions I decided to make at least 24 new sauces (or dips or dressings) in 2012. Sometimes it's too much to make an entirely new main dish, but a new salad dressing seems doable. And I'm happy to inform you that January isn't even half over and I've already succeeded in making a new sauce! (Please, hold your applause until the end. Thank you very much, though, thank you.)


from The New Laurel's Kitchen:

     Stroganoff Sauce

1 cup buttermilk
1 Tbls cornstarch

1 small onion, chopped
1 clove garlic (optional)
1 Tbls butter
1/3 - 1 1/2 cups mushrooms, sliced

1/4 tsp salt or 1 Tbls shoyu
black pepper
Combine buttermilk and cornstarch and set aside. Saute onion and garlic in butter until soft. Crush the garlic with a fork. Stir in mushrooms and cook just until tender. Remove mushrooms and juices from the pan and pour in the buttermilk mixture. Stir and cook until thickened, then return the mushrooms and their juices to the pan. Season with salt (or shoyu) and pepper.
The recipe claims to taste "like a sour cream sauce," and I suppose it does. And I even cheated a bit when I made it by substituting vinegar in milk rather than using the buttermilk that was called for (tell me I'm not the only one who doesn't ever have buttermilk on hand?) I also used dried mushrooms instead of fresh (soaked in boiling water for 10 mins to reconstitute), and they worked great.

Overall, I'm happy with the sauce, but I admit that when I first tasted it I thought it was just okay. What took it from okay to happy? Putting it on the bestest, most delicous rice ever.

I made this rice almost as an afterthought (had to put my sauce on something) and am still amazed by how wonderful brown rice is when done right. I'm not kidding. I'm a convert. No more brown rice in the rice cooker,  not ever again. This is the way it should be:

from Nourishing Traditions:


     Basic Brown Rice I
     (unsoaked rice)
    
2 cups long-grain brown rice
2 Tbls butter
2 Tbls extra virgin olive oil
3 cardamom pods
4 cups stock or combination of water and stock
1/2 tsp sea salt
In a heavy, flameproof casserole, melt butter and olive oil. Open cardamom pods and add seeds to the casserole. Saute rice in butter and oil, stirring constantly, until rice begins to turn milky. Pour in liquid, add salt and bring to a rolling boil. Boil, uncovered, for about 10 minutes until water has reduced to the level of the rice. Reduce flame to lowest heat, cover tightly and cook for at least 1 1/2 hours or as long as 3 hours. Do not remove lid during cooking. Serves 6-8.
My rice took exactly the 1 1/2 hours on the stovetop. And. It. Was. Wonderful. It sounds ridiculous, to say rice tasted wonderful. But I'm serious, cross my heart and everything. Wonderful.

Sauce + Rice = superb side for dinner and delectible leftovers for lunch (which I'm eating right now). Very, very pleased with this receipe attempt! (This is what I'd hoped for, starting Wellcookbooked!)

You may now applaud.

Tuesday, January 10, 2012

Pondering Mulled Cider

My post seemed well-timed for the end to this Christmas season (which ended, as far as I know, on Saturday, with the Orthodox Christmas Day). After all, a hot beverage is perfect in winter, it's easy to prepare in large quantities to share at holiday gatherings, and what with the pondering Mary supposedly did (seriously, does not every other verse about Mary say she "pondered...in her heart"?), a mug of mulled cider seems very apropos. Now, of course, I didn't hit the "Publish Post" button until after the holidays are over, so perhaps you'll call me on that one. But I was writing it during the holidays. ;-)

I used to make mulled apple cider by adding three ingrediant together:  apple cider (which, for all intents and purposes, in today's grocery is identical to apple juice. I think a distiction used to be there because cider wasn't pasturized, but that's no longer true, at least in non-speciality stores); cinnamon sticks; cloves. And the only direction I used was this:  heat until hot.

I have since learned that mulled cider can (and should) be much more.  Mollie Katzen has the best home-mulled cider recipe I've found (and just because it's the only mulled cider recipe I've found is irrelivant).


     Mulled Cider from Sunlight Cafe


Note: I couldn't find my copy of Sunlight Cafe, which is why this post is late, but here's the basic gist and I'll update with exact specifications once I lay my hands on my cookbook!
  • container of apple cider (or, if you're feeling fancy, your own home-pressed cider!)
  • peppercorns, whole (aprox 10)
  • cloves, whole (aprox 10)
  • cinnamon sticks, whole (aprox 2)
  • cardomom pods (aprox 5)
  • ginger, fresh
Pour the apple cider into the pot or crockpot. Break up the cinammon sticks into 4 or 6 pieces. Peel and slice up some ginger (I found 1" pieces were good). Add the cinnamon, ginger, and other spices to the cider (either loose or contained within a mulin bag or cheesecloth). Steep and warm on med-low heat for at least an hour or two (though can be drunk [dranken? drinken?] as soon as the temperature appeals to you).

Aromatic. Tasty. Simple. But not boring. This is world-class apple cider. Mmmm....